Apacheのインストール
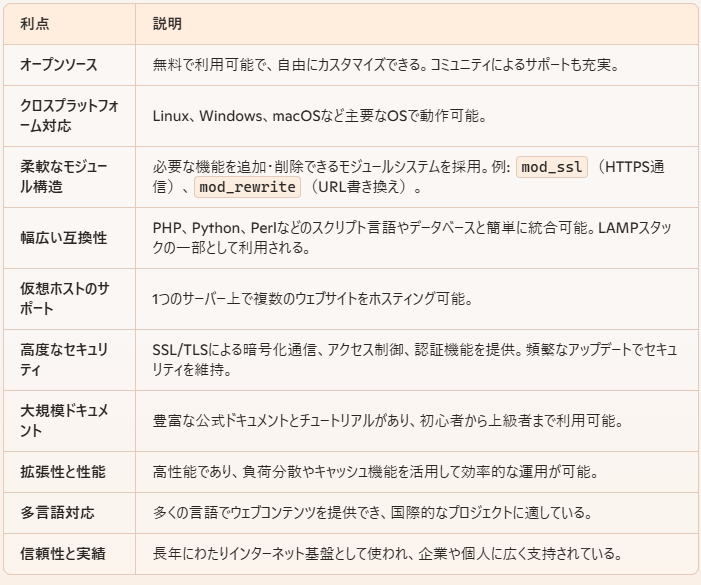
Apache HTTP Serverの利点
 |
では、始めましょう!
1 まずはdnfでどのバージョンをインストールするか調べる。
dnf info httpd
名前 : httpd
バージョン : 2.4.62
リリース : 1.el9
Arch : x86_64
サイズ : 47 k
ソース : httpd-2.4.62-1.el9.src.rpm
リポジトリー : appstream
概要 : Apache HTTP Server
URL : https://httpd.apache.org/
ライセンス : ASL 2.0
説明 : The Apache HTTP Server is a powerful, efficient, and extensible
: web server.
2 Apacheのインストール
dnf -y install httpd ※普通なら問題なくインストール終了する。
3 Apacheが、ちゃんと稼働しているか確認
systemctl start httpd
systemctl status httpd
● httpd.service - The Apache HTTP Server
Loaded: loaded (/usr/lib/systemd/system/httpd.service; disabled; preset: disabled)
Active: active (running) since Mon 2025-01-13 08:35:28 JST; 14s ago
Docs: man:httpd.service(8)
Main PID: 44346 (httpd)
Status: "Total requests: 0; Idle/Busy workers 100/0;Requests/sec: 0; Bytes served/sec: 0 B/sec"
Tasks: 177 (limit: 204624)
Memory: 38.5M
CPU: 67ms
CGroup: /system.slice/httpd.service
├─44346 /usr/sbin/httpd -DFOREGROUND
├─44347 /usr/sbin/httpd -DFOREGROUND
├─44348 /usr/sbin/httpd -DFOREGROUND
├─44349 /usr/sbin/httpd -DFOREGROUND
└─44350 /usr/sbin/httpd -DFOREGROUND
4 恒久的にApacheを起動させる
systemctl enable httpd.service
上手くいった。
Created symlink /etc/systemd/system/multi-user.target.wants/httpd.service → /usr/lib/systemd/system/httpd.service.
5 /etc/httpd/conf/httpd.confの設定を行う(基本デフォルトでOK)
ServerNameとListenのところだけ変更
systemctl restart httpd で一応再読み込み
6 firewall-cmdで80番ポートを解放(あとでSSL用のポート443もね)※Listenがssl.confと重複するとエラーになるので気をつけること。
firewall-cmd --permanent --add-service=http
success
systemctl restart firewalld ※再起動を忘れずに
7 テストする
テストページが表示されればOK
特に難しいということはないと思う。WEBアプリで使うならhttpd.confの編集は必須。各ディレクティブ設定は、ネットで多くあるので心配ないと思います。